Ever looked in the mirror and wondered, “What if my hair could magically arrange itself into perfect layers while I sleep?” Spoiler alert: it can’t. But what if I told you there’s a method that comes pretty close—one that turns your comb into a precision tool and your scissors into a trusty sidekick? Enter the comb and cut method for even layers, the DIY haircut hack that promises salon-worthy results without the salon price tag. Sounds too good to be true? Let’s dive in and see if this technique holds up—or if it’s just another haircut horror story waiting to unfold.
Meet the Texturizing Comb: Your New Best Friend
 Before you even think about scissors, you need the right tool for the job. Enter the texturizing comb—a hybrid between a regular comb and a precision cutting tool. Unlike your everyday comb, this bad boy has both wide and narrow teeth, allowing you to section your hair with ease while also creating subtle layers. Think of it as the Swiss Army knife of hair tools. But here’s the catch: not all texturizing combs are created equal. Some are gentle, others are aggressive, and a few might just turn your hair into a tangled mess. So, how do you choose the right one? Start by testing different combs on a small section of hair. If it glides through smoothly, you’re in business. If it snags like a bad relationship, keep shopping.
Layering 101: The Art of the Even Cut
 Now that you’ve got your comb, it’s time to tackle those layers. The key here is patience—and a whole lot of it. Start by washing and drying your hair completely. Wet hair is easier to cut evenly, and dry hair will give you a better sense of how your layers will fall. Next, section your hair into manageable parts. Use your texturizing comb to create clean, horizontal partings, starting from the nape of your neck and working your way up. The goal? To create even, horizontal sections that will guide your scissors. But here’s where things get tricky: if you’re not careful, you might end up with a mullet situation. To avoid this, always cut smaller sections at a time and check your progress frequently. And remember, you can always cut more—but you can’t uncut what’s already gone.
The Shirley Comb Sorter Method: Old-School Meets New School
 If you’re feeling adventurous, there’s another method that’s been around for decades: the Shirley Comb Sorter Method. Originally designed for sorting textile fibers, this technique has found a new life in the world of DIY haircuts. The idea is simple: use a comb to separate your hair into different lengths, then trim accordingly. Sounds easy, right? Well, not so fast. This method requires a steady hand and a keen eye for detail. Start by combing your hair from root to tip, then use the comb to lift sections of hair and trim the longer strands. The goal is to create a gradual, even transition between layers. But be warned: if you’re not careful, you might end up with a haircut that looks like it was styled by a tornado. Practice makes perfect, so start with small sections and work your way up.
From Scissors to Style: Adding Texture to Your Layers
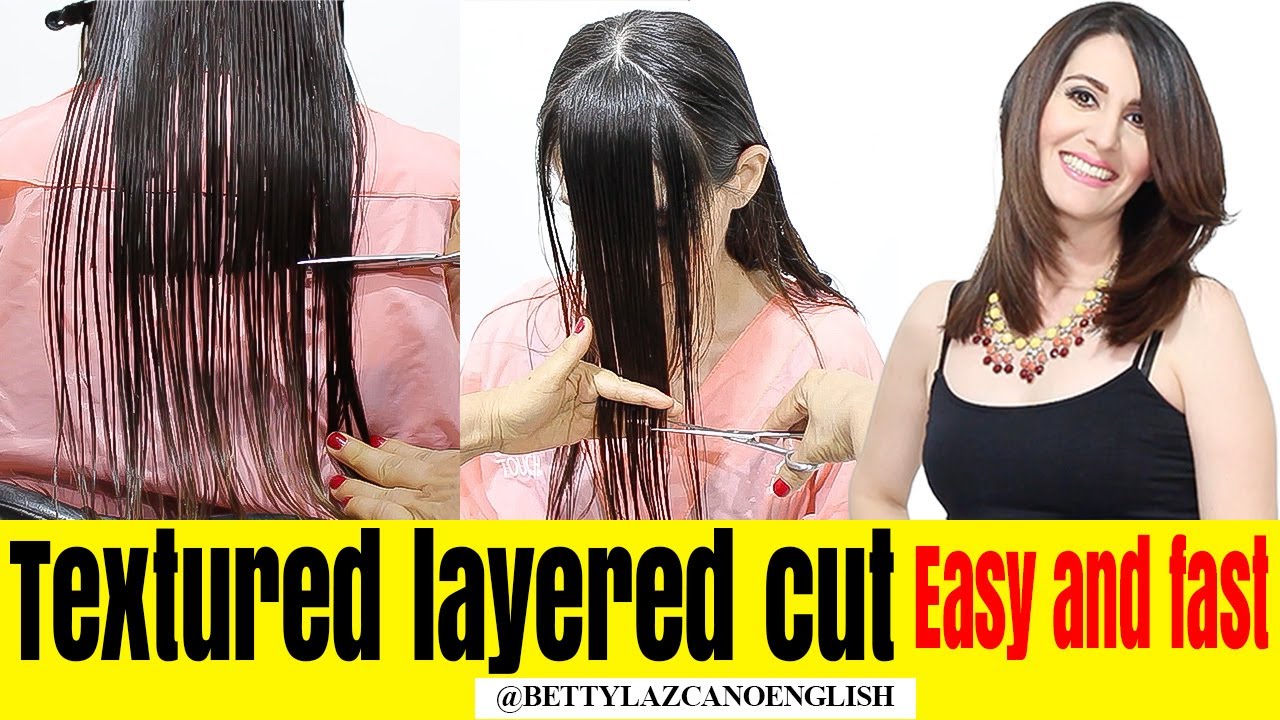 Layers are great, but texture? That’s where the magic happens. Adding texture to your layers can take your haircut from “meh” to “wow” in seconds. But how do you do it without turning your hair into a bird’s nest? Start by using your texturizing comb to create subtle, vertical sections in your hair. Then, use your scissors to snip small, random pieces along the edges. The goal is to create a lived-in, effortless look that frames your face beautifully. But here’s the catch: too much texture can make your hair look thin and wispy, while too little can leave it looking flat and lifeless. So, how do you strike the perfect balance? Start with small snips and check your progress frequently. And remember, you can always add more texture—but you can’t take it away.